It is a good practice to have your tiling laid by a specialist company with sufficient experience. A client with plenty of experience can lay their tiling as DIY.
Method of tile laying:
- on a mortar or concrete bed (interior and exterior)
- on adhesive cement on the entire surface (interior and exterior)
- on a gravel bed (exterior: terraces, pavements and various walking surfaces)
- on dilatation pads (exterior: rooftop terraces and balconies)
General recommendations:
- Selecting the proper tile-laying techniques depends on the application of the tiled surfaces, on the existing or planned type of bedding as well as on the skill of the staff.
- It is not recommended to lay tiles at temperatures below 5 °C or higher than 25 °C.
- Prevent the contact of the product surface with cement or other materials that cause colouring.
- Having been laid, the tiles absorb moisture from the bedding up and wet edges may occur – they disappear when the tiles are laid correctly.
- When laying polish-ground terrazzo tiles indoors, it is recommended, for safety reasons, to treat the surface, e.g. by gluing anti-slip strips, or to apply chemical coating that increases anti-slip properties.
- CAUTION! The GRANEX® tiles cannot be laid on standard dilatation discs (only on special discs with greater contact surface and a centre disc).
- For all types of tile-laying, it is important to maintain joints measuring 3-5 mm.
- More details on the following pages of this data sheet.
- CAUTION! Failure to comply with recommended procedures, possible complaint may not be recognized.
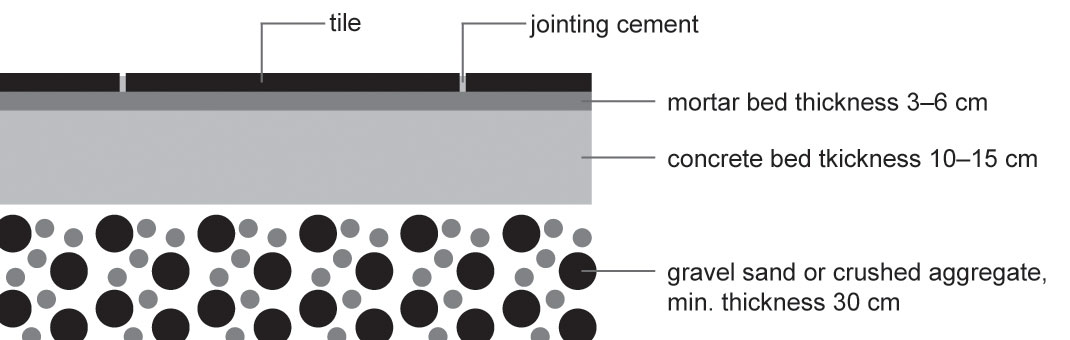
Laying of all the TopTeramo tiles on a mortar or concrete bed
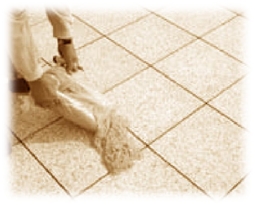
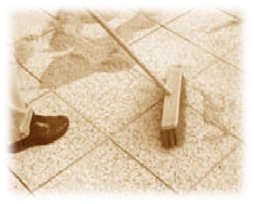
This is a common technique of tile-laying. It is mainly used when there is not a flat concrete base or if gradient needs to be created. The condition is to have a concrete base built already of the thickness of 10-15 cm in the required gradient of at least 2 %; it must be properly mature, coherent and free from any impurities. Prior laying, the concrete base must be moist but not wet (wetting is especially important at higher temperatures). This base is covered with a mortar layer, 3-6 cm thick, in strips of about 50-60 cm. To maintain uniform thickness, wooden squared logs can be used as a tool. After removing the wooden squared logs, the strips are filled with mortar and tile-laying can begin.
To improve the connection, it is recommended to apply mortar milk (= 1 kg of cement + 1 litre of water) on the mortar bed prior laying the tiles.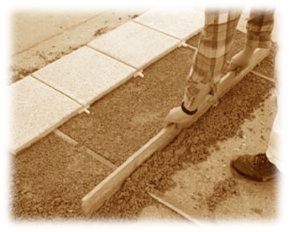
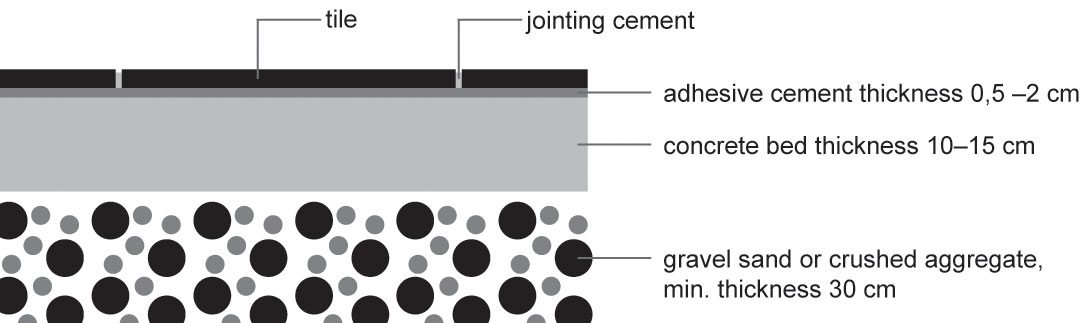
Laying all of our tiles on adhesive cement on the entire surface
The condition prior tile-laying is to have a concrete base built already of the thickness of 10-15 cm in the required gradient of at least 2 %; it must be properly mature, coherent and free from any impurities. Prior laying, the concrete base must be moist but not wet (wetting is especially important at higher temperatures). When tile-laying out of doors, it is necessary to use flexible adhesive cement.
The actual tile-laying with all-surface gluing is done as follows:
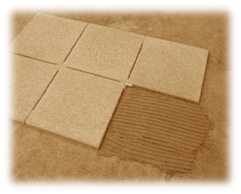
- when gluing indoors, the adhesive cement, 0.5-2 cm thick, is applied on a concrete base using a notched spatula (recommended size of the tooth is 10×10 mm) and tiles are laid afterwards – they are made flush by tapping with a rubber hammer.
- when gluing out of doors, the adhesive cement, 0.5-2 cm thick, is applied on the entire surface and tiles are laid afterwards – they are made flush by tapping with a rubber hammer.
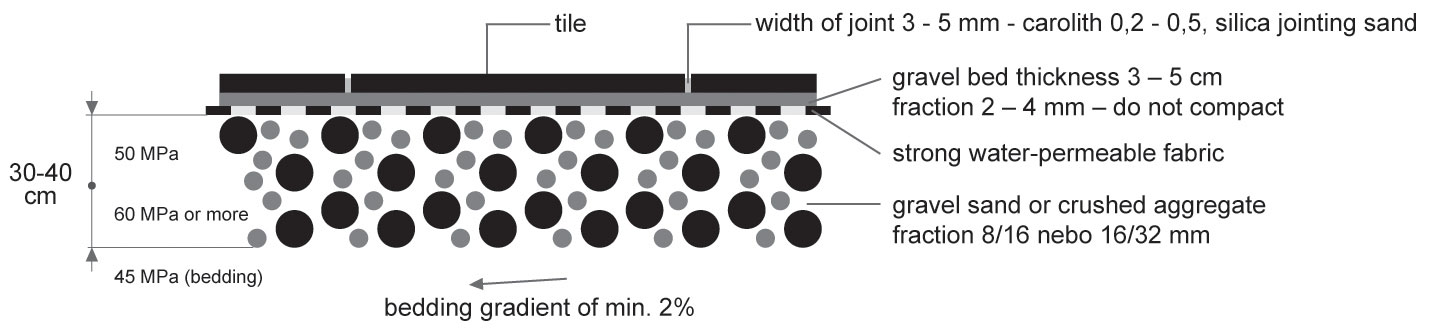
Laying the Mramorit® and Mramorit® XL tiles on a gravel bed
Laying of areal tiling on a gravel bed or to grits is a long-time traditional technique of tile-laying. This method of tile-laying is perfectly suited for indoor terraces, pavements and various other areas used for walking.
This technique of tile-laying has several indisputable advantages that certainly include its favourable price, the possibility to replace easily a damaged piece and the absence of problems with dilatation movements. Therefore, under the condition that the tiles will be laid with joints between each other. It is not recommended to lay tiles without any joints (it is called edge-to-edge) because the tile edges may be chipped off. Moreover, tiling laid edge-to-edge retains moisture and this can lead to the formation of lime laitance. Therefore, maintain a uniform joint width ranging from 3-5 mm.
The foundation stone of the proper function is the proper treatment of all the base layers starting from the base course through the load-bearing layer to the tile-laying layer. Most of later problems with tiling stem from incorrect or inadequate treatment of the bedding.
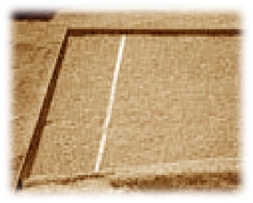
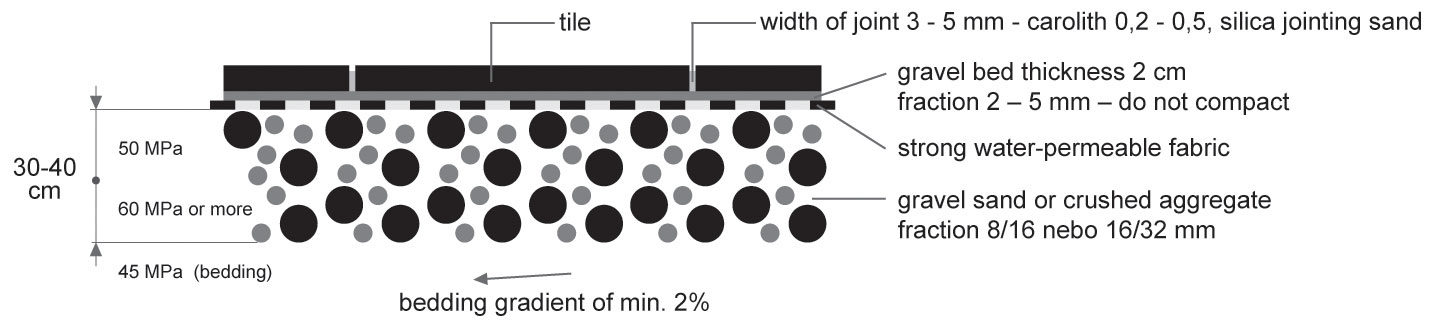
The first step is to prepare the base course that must be dug away to the height needed to store all the subsequent bedding layers. To avoid problems with draining water, ensure sufficient appropriately directed gradient of the base course. As a rule, the minimum value of the gradient should be at least 2 %. Compaction of the base course using a vibrating plate is crucial. The strength of the base course should be at least 45 MPa. Recommendation: The stability of a tiled surface against side shifts is ensured by delimiting the tiled surface with kerbs.
When the base course is prepared, the load-bearing layer can be applied. The thickness of the load-bearing layer should be within the range of 30 to 40 cm. The application and compaction should be done in layers with a maximum thickness of 20 cm. The strength of the load-bearing layer should be 60 MPa. It is recommended to use high-quality crushed aggregate, the fraction of 8-16 mm or 16-32 mm with the minimal amount of fine particles, so that nothing can prevent water drainage.
After laying the load-bearing layer, the tile-laying layer can be created. Its thickness should be 2 cm. It is recommended to use crushed aggregate, the fraction of 2-5 mm. Do not use aggregate with high content of dust particles or siftings. The tile-laying layer is not compacted but it needs to be levelled well.
The actual tiling is laid on the levelled tile-laying layer. Always proceed against the gradient of the tiled surface. Lay the subsequent rows from the already tiled surfaces.
Potential minor colour differences between various production lots can be prevented by taking the tiles alternately from multiple pallets.
To obtain a better fit and to achieve the final position, tap the tiles with a rubber hammer. It must be emphasized again that the tiles need to be always laid with uniform joint width of 3-5 mm.
Align non-standard sizes by cutting the required number of tiles.
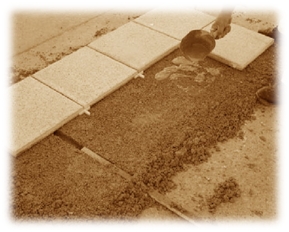
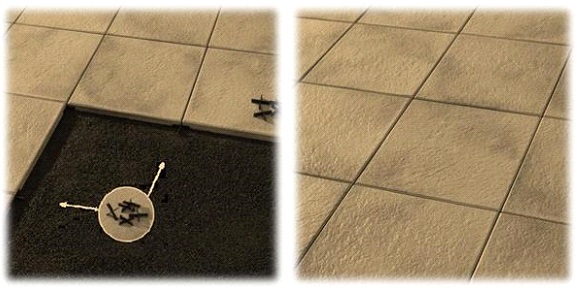
After laying the tiles, fill the joints by sweeping in marble rubble CAROLITH, the fraction of 0.2 to 0.5 millimetres or silica sand.
Never compact the tiling using a standard metal vibrating plate.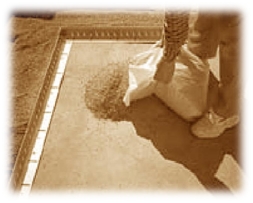
Laying the Granex® and Granex® XL tiles on a gravel bed
The procedure for laying lightweight single-layer tiling Granex® and Granex® XL on a gravel bed differs from laying the Mramorit® and Mramorit® XL tiles in that the tile-laying layer thickness should be 3-5 cm and the used crushed aggregate for this layer should have a fraction of 2-4 mm. Other tile-laying requirements are the same.
Laying the Mramorit® and Mramorit® XL tiles on dilatation discs
This tile-laying method is used on precise base concrete surface with a minimum gradient of 2 %. Tiles are placed directly on plastic dilatation discs. Any unevenness can be compensated by using shims. The advantage of this method is an easy access to the isolation for repairs. When laying tiles directly on waterproofing, to prevent ripping it, it is recommended to use a protective foil. Drainage of water through the foundation or sideways must also be ensured because the tiles could be damaged by permanent moisture (reaction of the cement, etc.). It is recommended to secure the edges of the laid tiling against lateral shifts by attaching profiles of perforated stainless-steel sheet metal.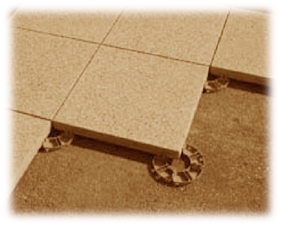
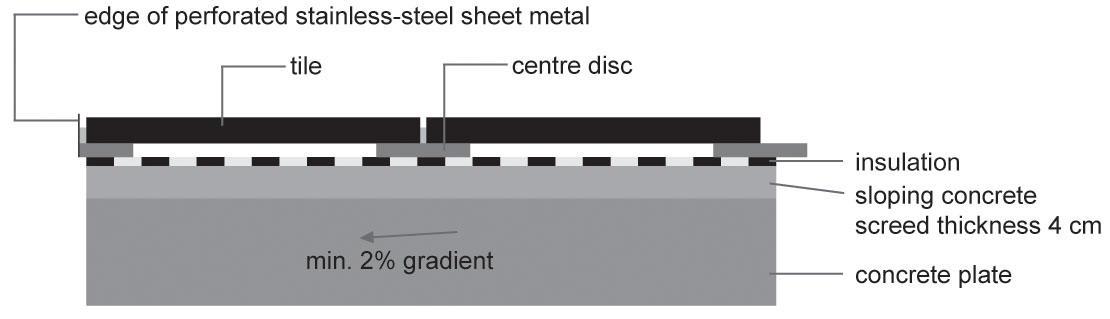
Laying the Granex® and Granex® XL tiles on dilatation discs
This method is suited for laying the Granex® and Granex®XL tiles in which there is a risk of damaging the tiles under load. This tile-laying method is used on precise base concrete surface with a minimum gradient of 2 %.
Tiles are placed directly on special plastic dilatation discs. These discs allow to compensate for any unevenness using four threaded screws in the corners. Furthermore, these discs, as compared to standard discs, support the tiles in the corners through a greater surface area, which helps to reduce the risk of damaging the tiles under load. However, a tile could be damaged (broken) under a higher point load at the centre of the tile. To eliminate the risk of damaging the tiles, it is necessary to use another disc, which is placed in the centre of each tile. This disc is different from the discs located in the tile corners; its height is corrected by the tile weight (it acts as a spring), which is needed for proper fitting a tile so that it is supported at 5 points. Adjusting the height of this disc is performed using cement (e.g. MAMUT GLUE) whose surplus is squeezed out after the tile placement. When the cement hardens, the tile will be supported ideally, which minimizes the risk of damaging the tile under load.
Instead of cement, it is possible to apply appropriate glue (flexible glue for tiling and paving) to the centre of the disc. Using this glue, it is also possible to fix a tile to the discs in the corners (not necessary) but in the event disassembly of the tiles the discs may be damaged.
The advantage of this laying method is an easy access to the isolation for repairs. When laying tiles directly on waterproofing, to prevent ripping it, it is recommended to use a protective foil. Drainage of water through the foundation or sideways must also be ensured because the tiles could be damaged by permanent moisture (reaction of the cement, etc.). It is recommended to secure the edges of the laid tiling against lateral shifts by attaching profiles of perforated stainless-steel sheet metal.

Laying the Granex® XL tiles on dilatation discs
The laying variant, where the tile is supported by six targets, allows both regular laying of the tiles next to each other and also for binding, where the individual pieces are shifted against each other, while it is a regular shift of half the length. 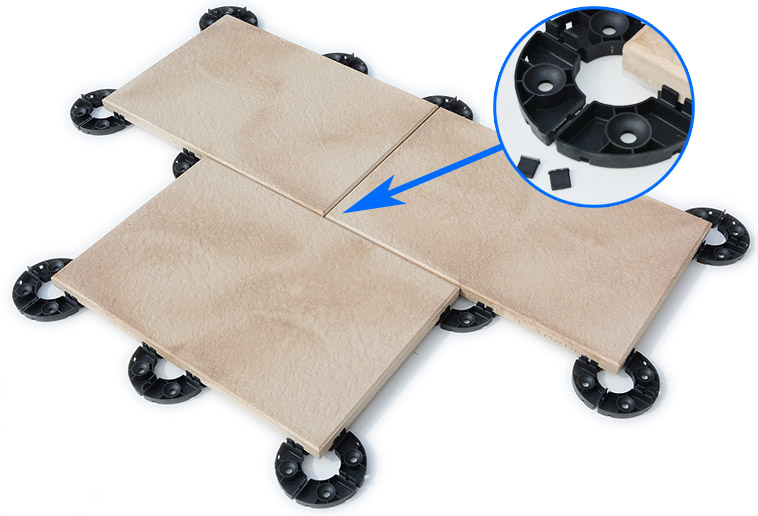
The application itself is performed on a precise base concrete provided with a waterproofing layer with a minimum slope of the base of 2%. The tiles are laid directly on the plastic expansion discs. We place the discs in the corners of the pavement and also in the middle of the longer sides. For discs placed in the middle of longer edges, break with delimiting pins so that they do not impede the laying of paving. Any unevenness can be compensated with a leveling pad. The advantage of this method is the simple approach to insulation during possible repair. When laying discs directly on the waterproofing, we recommend using a cover foil so that it is not damaged. An important factor for the proper functioning of this type of laying is to ensure trouble-free water drainage.